Well, this week has been hectic!
although I have been pre-occupied with Flat Pack Furniture and other fun stuff I have managed to make some progress.
I have managed to finish the Tank positions. I did this in a similar fashion to the tranches, only I added an extra layer on the sides as I thought that these would be made with a specific field of fire in mind upon construction. I also added an extra set of matches to make them 'deeper' as the positions would be designed to protect the occupants from other tanks.
I am fairly happy with the result (pics below) although I am a bit concerned that the shape I have made them may mean that the bases for my artillery/emplaced positions may not fit as well as a tank (Meh I'm still happy for version 1)
Total Spend:
Polly filler £0 (left over from trenches)
3 x match boxes £1.05 (due to the extra layers)
Card £0.00
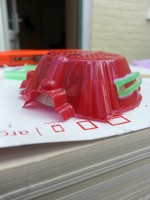
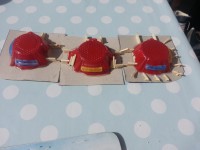
I was having some problems deciding on how to make the bunkers. my bits box was sorely depleted (I moved to the area about three years ago, and although I brought my completed models I left all my bits behind... sorely regretting that now!) and I didn't trust my crafting skills to try and sculpt them. looking at the rules I saw that I didn't have to make a sprawling base (although I want to make one for my trenchers eventually as I am viewing them as PDF troops, where as the Steel legion are brought in off planet when the it all goes to Xenos / heretical shaped) but only something big enough for three bases to reasonably fit in. I struck upon the idea of using the 'cup' parts from a Mr Kiplings cake boxed set as the bunkers.
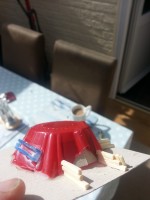
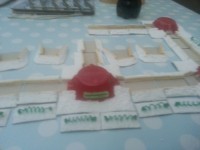
I cut them up and sure enough they would be good enough. I left a slight overhang from the parts which over hung and simply stuck some card to the inside (I needed to do a bit of cutting and folding to get them the right shape) which will be fine as doors/curtains when they are hung up. I was even happier to find that I could add a trenched entrance that was an almost exact match for the already existing trenches! Win!
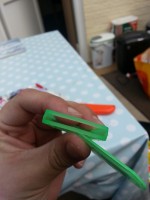
I had the shape, but a bunker isn't a bunker unless the troops inside can fire out. My helpful other half helped me out with this. She knew that I have been hording junk for this project and had given me a load of really cheap key rings, after a bit of cutting (see below, the horrendous green thing) I used the end of it and simply glued it to the edge. I had just enough to complete 6 of the bunkers. I am slightly concerned about how i am going to paint them, but I figure paint the hole black and maybe stick some off cuts of plastic as gun barrels sticking out and it should be ok... from a distance...
Total Spend:
Mr Kiplings Cakes: £3.00 for two boxes of 6.
Key Chains: for me nothing, but normally £1.00 for 6 or 8 from Poundland.
Matches: £0.35 for one box.
Polyfiller: £0.00 (still left over)
everything was put together it doesn't look too bad, enough to represent an emplaced hill / crossroad and didn't cost me an arm and a leg!
I have also (although no pics) have found a way to make some roads and fields. I simply went to Poundland (love that place) and got a pack of 4 floor tiles with self adhesive backs. I took the back off and simply turned it around and re-stuck it. I then cut them up into suitable lengths and after adding some borders with some of the left over poly filler as sides I have my roads (need painting) the reason I got the tiles is I am hoping that the texture of the cheap lino will look like concrete / tarmac ... and if it doesn't I only wasted a quid. for the fields I got one of the cheap doormat with a ridged effect. Again I cut that up into 'field shapes' (mostly rectangular, but a few odd shapes thrown in) and done! the matt is brown to begin with and a bit of careful dry brushing on the ridged section should make it look like rows of crops.
I wish I got the field and road idea in a moment of genius, but I have out right robbed it from a blog I found online!
my next project is some forests....
| Attachments: |
Bunker 7.jpg [ 1.74 MiB | Viewed 7508 times ]
|
Bunker 10.jpg [ 1.89 MiB | Viewed 7508 times ]
|
Bunker 11.jpg [ 1.77 MiB | Viewed 7508 times ]
|
Bunker close 3.jpg [ 1.83 MiB | Viewed 7508 times ]
|
File comment: all together with wire added
Complete 3.jpg [ 1.86 MiB | Viewed 7508 times ]
|
|

