Had a game using Tau 6.71 against Markconz's Eldar a week and a bit ago.
The Water Caste had negotiated a deal with a local Kroot Enclave.
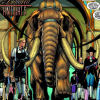
As in, I finally managed to get my Onslaught miniatures painted up.
No formal report, due to lack of time to process pictures, etc.
Game board was still set up from
last time, to see the table viewed from Eldar side scroll down a little way (first image of the table).
Heard from an Eldar Farseer on the right flank, "we have a bit of a Kroot situation here".
Anyway forces roughly, Eldar, left in city: Mechanised Aspects + Supreme, Night Spinners, Falcons+Firestorms, single Scorpion, Rangers, Blitz (Guardians with Wraithguard in web).
right on baseline: pair of Revenants, single Scorpion, Shining Spears,
Reserve: Guardians in Vampire.
Tau spread more uniformly across board (right to left as seen from Eldar side of table)
garrison: 2 x Kroot (10 units ea), Tetras (4 Tetra+2 Piranha), Large Kroot (15 units), and Foot Fire Warriors (with Etheral, Bonded Team and Pathfinders) in behind as a Blitz Guard.
in deployment zone: Pathfinders, Piranhas (incl 1 Tetra), Boardsides, Crisis Suits (Shas'el), Hammerheads (4 rail gun + skyray), Crisis Suits (Shas'el), mechanised Fire Warriors with skyray, Piranhas (incl 1 Tetra).
off board: 2 x stealth suits, Orca, pair of Barracudas.
So you can see a couple of errors/omissions from me right there. Was so focused on getting the Kroot horde onto the board that I forgot that you can deploy Broadsides in garrison (15 cm moves). Have been dropping them off where I want them from an Orca for too many recent battles. Also 2 Devilfish don't stop the Pathfinders from deploying forward (more scouts in the formation) but think I could not find anywhere that would hide them sufficiently.
This time the focus was putting out as many of the changes for the 6.7.1 list as I could manage, based of course around getting the most recently painted figures on the table.
The game went two and fro and hung in the balance until the last turn. Sustained fire over a couple of turns had knocked the Revenants out (Blitz). The game was won by a Kroot Kindred assaulting a Scorpion while also deploying to claim two T&H objectives. Their scout AND infiltrate being very useful. Anyway they WON, ate the crew and claimed the DNA.
Comments on the various units under review.
Stealth Suits: As usual I deployed these with ultimate aggression, putting the Eldar right flank in scout ZOC. This is probably/possibly not the best use of them. It does markerlight the enemy, force their hand, keep them reactive (rather than proactive), but does make the life expectancy of my stealth-suit crews rather short. Their one 1 on the dice was re-rolled to leave no BMs. Mark attacked them with his Shining Spears, which drove into rough terrain to chase them (one crashed!!). Suits broken but the comment from Mark was something like, "they are the best assault troops in the army" by which he meant FF5+ (first strike) and RA5+; not so relevant against Lance armed Eldar in close combat!!
Other formation was put in to provide possible crossfire on the other flank. They threw four 1s and on the re-roll took one BM. They distracted the Eldar Mechanised Aspect Warriors for a turn which took the sting out of the dreaded triple assault. No spare points for Gun Drones this time around.
Crisis Suits: These I purchased with a Shas'el included in the 250 points price. A couple of posts have discussed this but basically my reasoning is: fluff wise a Shas'el always leads a group of Crisis Suits, points wise each suit is 50 points, +25 for the formation, +25 for the Shas'el giving the standard formation cost of 250 points, command and control is improved by giving the formation co-ordinated fire, and finally (not used here) make it possible to get 2 leaders in the supreme commander formation to help with BM management on a small relatively critical formation.
In this battle I managed to keep the two formations behind the Forward Edge of Battle Area (or should that be FLOT) for most of the first two turns. Having two formations helped a lot. Perhaps most significant was the ability to launch coordinated fire missions (with Initiative 1+) that took down the Swooping Hawks and ultimately took out the Eldar Guardians (with wraithguard) in the city fighting. One formation finished the battle in tact, whilst the other had a lone crisis suit and two gun drone units at the end. Convenient buildings and the Tau jet pack rule were put to good use as well.
Railgun Hammerheads: These guys never really got into position for a good shot at reinforced armour targets. That was because they got heavily targeted. So their utility was as a threat in being more than anything. Only way to address this is, I think, by having more of them, . . . but then I have only built one and was already proxying the rest.
Etheral: The new rule was not put to the test this game. This Fire Warrior formation was sufficiently tooled up to count as the BTS. And deployed cautiously as a blitz guard. They failed their activation in the final turn when they might have shot the damaged mechanised Aspect Warriors off a T&H to claim Defend the Flag. The embedded pathfinders would have given markerlights and an ability to stretch the formation back to still claim the blitz as well.
Tiger Shark and Gun Drones: Did not find enough points to deploy these. I was worried about super Eldar AA, but discovered during the game that Mark is relatively light on Fire Storms, . . . hummm, . . . next time, . . .
Also had plenty of 15 cm AP disrupt fire in the army already, . . .
Currently working on a (home made, laser cutter) Manta. It is
HUGE. As in really
H U G E.