Tactical Command http://www.tacticalwargames.net/taccmd/ |
|
Batrep: Chaos Undivided vs. Tau 5.1 http://www.tacticalwargames.net/taccmd/viewtopic.php?f=14&t=9633 |
Page 1 of 1 |
Author: | zap123 [ Sat Jun 09, 2007 1:39 am ] |
Post subject: | Batrep: Chaos Undivided vs. Tau 5.1 |
Hi All, Next in the sequence of Tau tweak and tune battles, a 4000 pointer featuring the forces of Chaos facing up to the all singing, all dancing updated Tau. Chaos Force (strictly from the 5.0 book) - Iron Warriors Century - Rhino detachment - Chaos Land Raider Company - Chaos Bike Company - Chaos Warlord (Carapace Landing Pad, Deathstrike, MRL x3, Tail) - Beastman Company - Dreadclaw Assault Shuttle Tzeentch Allies - Magnus the Red - Deamon Prince of Tzeentch - Doomwings - Rhinos (5 Chaos Reward cards + Iron Warrior specific card) The Tau (JW can clarify this) - Battlesuit Cadre - Hammerhead Cadre - Firewarriors Cadre (non mechanised) - Moray (Manta Jnr.) - Tigershark A1X - Skyray detachment Kroot Allies - Carnivore Company (new option) Here's the set up: ![]() |
Author: | zap123 [ Sat Jun 09, 2007 2:10 am ] |
Post subject: | Batrep: Chaos Undivided vs. Tau 5.1 |
Turn 1 - Initiative Chaos. 
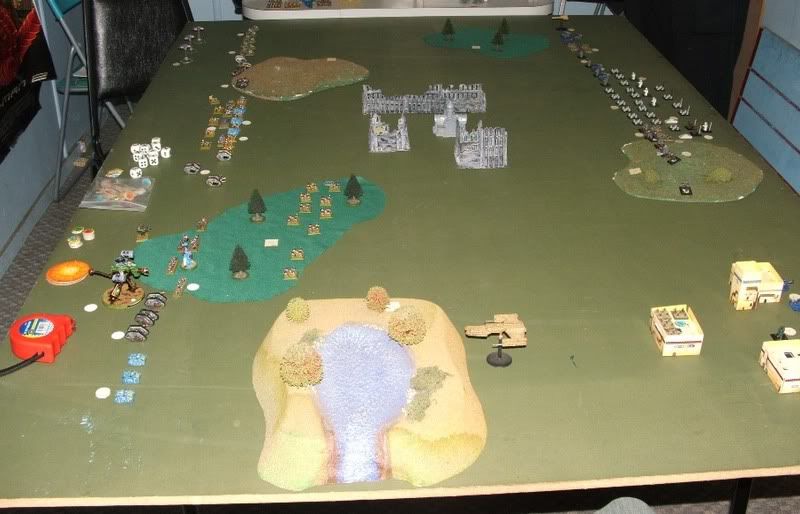
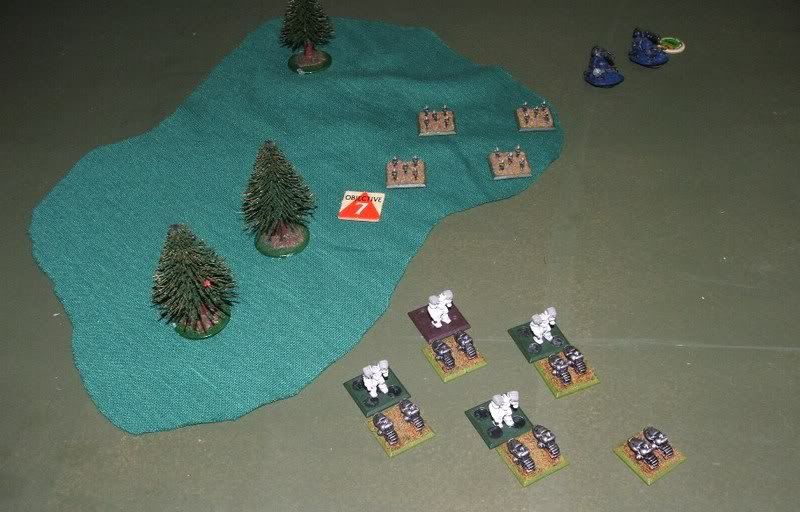
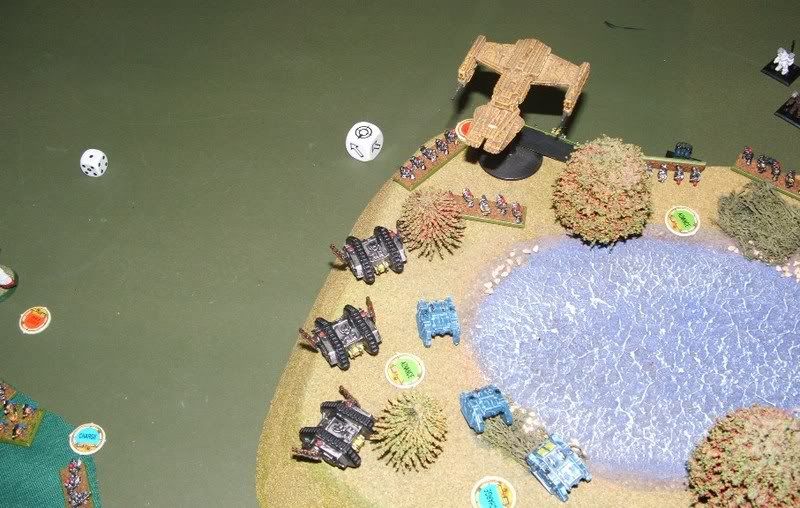
And battle is joined. ?Both forces quickly move to secure strategic locations on the battlefield. ?The Moray streaks down from orbit and hovers menacingly over the waterfall on the right flank, the Kroot surge forward in the centre, while battlesuits move in support. ?On the far left Firewarriors and Crisis suits secure the objective in the small copse. The Chaos forces concentrate the majority of their numbers in the centre, with the beastmen and bikes all surging toward objectives there, supported by Iron Warriors and Land Raiders. ?On the left a detachment of Land Raiders and their command vehicle try to claim the high ground, while on the far right Land Raiders and Iron Warriors in their rhinos move to take the high ground around the waterfall. ?Seeing the huge Tau Praetorian descend Magnus makes a bold move to bring it under his gaze, thereby exposing his position to the entire Tau army. 
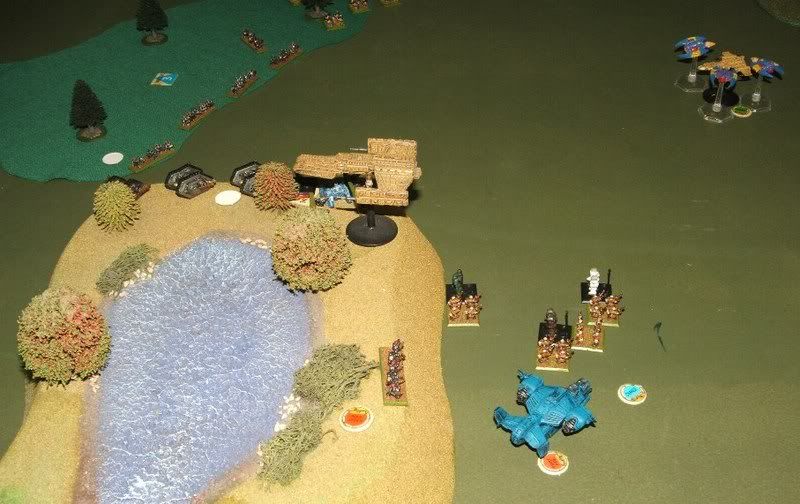
The Warlord titan opens the precedings and its' combined barrages kill 4 Firewarriors, 2 Kroot and 2 Battlesuits, but fail to dent the Moray. ?The Tau warmachine opens up, pummelling Magnus and the Iron Warriors, killing two of the later. (2 Rewards gone). ?Magnus then unleashes his beam of power, passing straight through the Tau Deflector Shields and striking the bridge of the Moray. ?It's crew struggle to keep control and the Moray makes an erratic landing, killing another Iron Warrior squad. ![]() Moray Crash Hammerheads hit the Land Raiders on the right but they save, however their return fire is wayward. ?On the left the Tau MBTs fair better and destroy all 4 Chaos Land Raiders before they could claim the objective, or fire a shot. ?In close combat, 2 Chaos Bikes are destroyed but not before killing 3 Tau Battlesuits. 
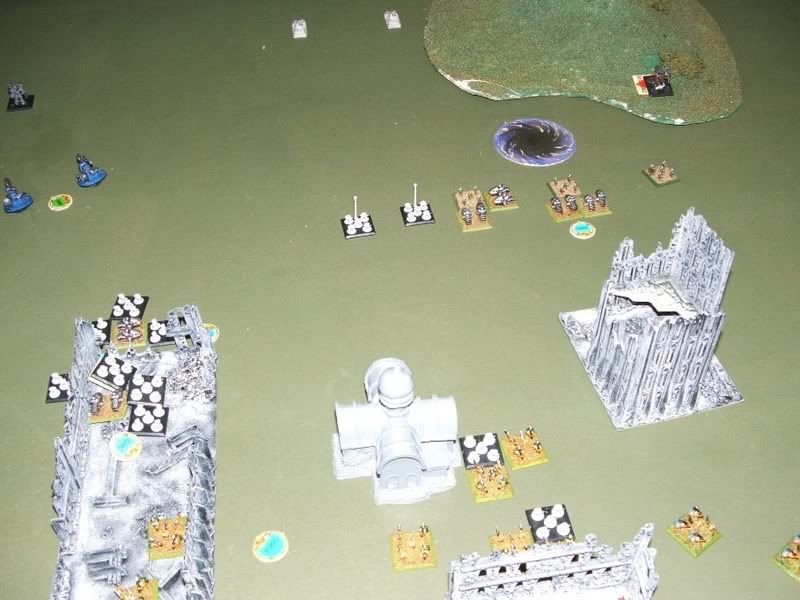
Advanced fire and the Iron Warriors remaining on the right kill another Battlesuit and have a shot bounce off the Morays' fields. ?The Broadsides in the centre then wipe an entire detachment of Land Raiders off the face of the battlefield. ?As a minor payback, the Iron Warriors there shoot 2 more Kroot squads and some Vespid. In the end phase none of the Iron Warriors regenerated, and the Moray did not repair the damage to its bridge. ? Chaos 25 vs. ?Tau 23 |
Author: | zap123 [ Sat Jun 09, 2007 2:41 am ] |
Post subject: | Batrep: Chaos Undivided vs. Tau 5.1 |
Turn 2 - Initiative Tau Both armies surge forward in the centre and there is a giant clash of Kroot and Firewarriors on one side and Beastmen and Bikes on the other. ?On the right the Tau Battlesuits use their mobility to pick off a Marine stand and try to snatch the objective there. ?The Tau also see an opportunity to snatch the high ground on the left flank and the Hammerheads and Crisis suits advance, while the command Hammerhead streaks forward. ?The Bike Company commander skids around and engages the bold Tau tank. ?The Tigershark heads towards the Chaos titan, and the Doomwings try for the decisive dogfight. ?The Tau Skyrays are unerringly accurate, but the Doomwings shrug off the AA shots to surround the Tigershark. ?With the AA gone, the Dreadclaw descends on the far right disgorging its Ogryn passengers onto the command Battlesuits. ![]() Decisive Air engagement Magnus tries to withdraw behind the forest but is assailed by the Broadsides on the distant hill and the damage is too great even for his patron to prevent and he is cast back into the Warp. ?The few remaining Land Raiders target the Moray, knocking out the last field and destroying the right Ion battery. ??Then the Iron Warriors in the forest unleash their missile launchers on the un-shielded Tau preatorian and a flashback to the engine destroys the war machine in a spectacular fireball that miraculously only kills a Battlesuit and an Ogryn. In the centre the Kroot Shapers kill 3 unengaged Beastmen. The Chaos titan kills 1 Firewarrior, 3 Kroot and 2 of the nigthmarishly accurate Broadsides; Iron Warriors kill 2 Shapers and a Vespid, and the Firewarriors in the center gun down a bike. ?The Hammerheads on the right predictably atomise the grounded Dreadclaw. ![]() Close combat time and the carnage begins. ?On the left, the Chaos Bikes kill 3 Crisis suits for 1 of their own. ?In the blood bath in the center, the Kroot clear the remaining 2 bikes off the objective there for the loss of 2 of their own number. ?Beastmen kill another 2 Kroot for 1 loss, the Vespid are all but wiped out and the bikes overrun 2 Firewarrior stands. ?The bike Company commander kills the command Hammerhead. ?In the major engagement on the right, the Doomwings knock the Tigershark from the sky, and the Ogryns and Battlesuits go 1 - 1, while the courageous Rhinos prevent the Crisis suit on the right snatching the waterfall objective. ![]() After the bloody hand to hand combat, the advancing Battlesuits and Hammerheads clean out the bikes from the left flank and kill a number of unengaged Beastmen in the centre, while the Deamon Prince vapourised the last Vespid. In the end phase the Iron Warriors predictably all failed to regenerate, but all except a wayward Rhino passed their break tests. ?The majority of the Tau formations were also broken but they did not fair so well in their tests. Chaos 53 - Tau 38 |
Author: | Juffo-Wup [ Sat Jun 09, 2007 9:20 am ] |
Post subject: | Batrep: Chaos Undivided vs. Tau 5.1 |
The actual Tau list was: Hunter Cadre (3 Fire Warrior Detachments and 1 Broadside Detachment) Moray Assault Ship Skyray Gunships Tigershark Variant (AX-1-0) Battlesuit Cadre (2 Battlesuit Detachments and 1 Broadside Detachment) Vespid Stingwing Flight Hammerhead Cadre Kroot Carnivore Horde Despite losing again, this was a much better ouyting for the Tau. The Fire Warriors are better for their points cost now. Once again I completely forgot to infiltrate the Kroot which would have made a world of difference. This battle included a new Kroot formation: The Carnivore Horde. All it is is 4 Shaper Stands and 16 Carnivore Stands. Simple. The Kroot had no simple, basic army cards so I thought they could use one. It was determined that the Hammerheads are a little too expensive, so they will get a slight discount while the Broadsides are far, far too good for their cost and will get a significant increase in their cost. The Moray proved to be not very cost-effective as it is nowhere near as durable as the Manta. It gets a slight discount as well. I now have a few Tau figures in hand so the next battle report should have fewer Proxy figures. Here's hoping! |
Page 1 of 1 | All times are UTC [ DST ] |
Powered by phpBB® Forum Software © phpBB Group http://www.phpbb.com/ |